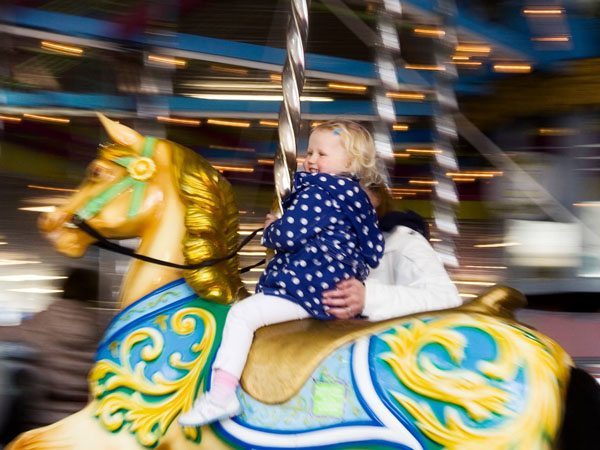
Are you ever out and about and think to yourself “That would make a great photo?” Or are you the person standing next to them thinking ‘What are they seeing that I’m not?”
Well, whether you have an eye for photography or not, I’ve pulled together a list of tips I have found to be of great use to me over the last few years that I’m keen to share with you.
I hope you find them useful!
Photo Tip 1
‘I don’t like cheese’
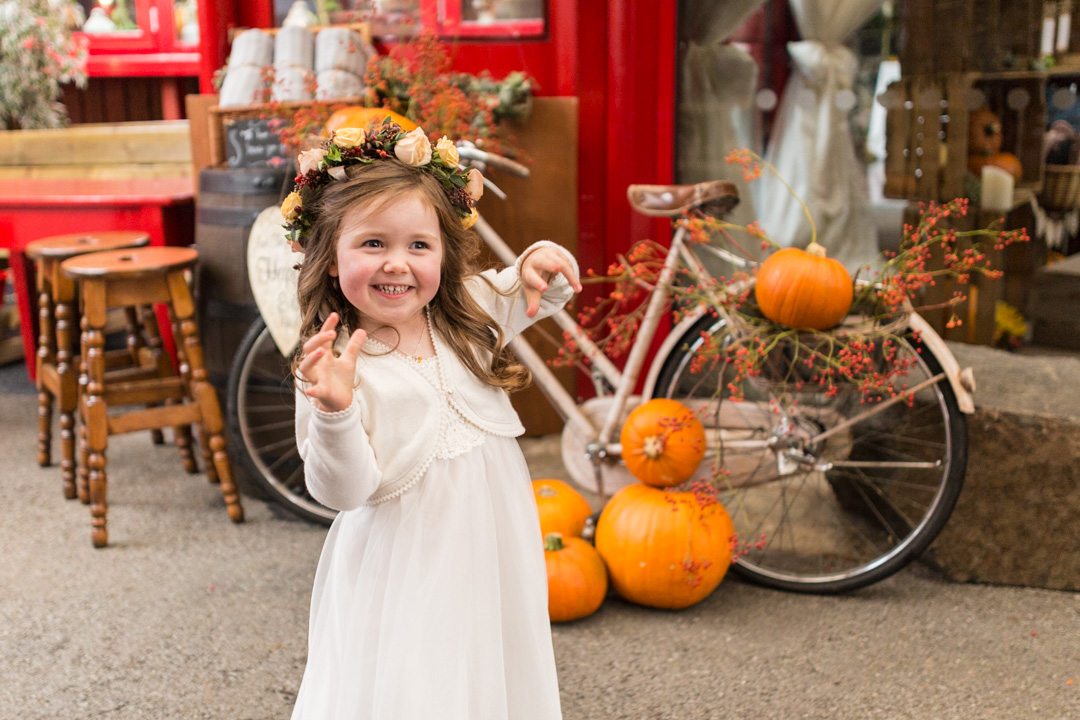
Cheese is great for many things – Pizza, Lasagne, Burgers to name a few but it’s not great for getting a nice, natural smile. It forces the cheekbones up, and widens the mouth (as does sticking your head out a car window at 40mph)
There is a better, more enjoyable way to get a more natural smile – LAUGH!
Yes, in this case laughing can be the best medicine…it shows the real emotion of the person, & more often than not brings a smile to your face. So the next time you photograph your kids why not tell a joke, or make a silly face or sound – and try and capture that real emotion!
Photo Tip 2
Hurry up and finish ‘La Sagrada Familia’
If you have been to Barcelona you’ll have been mighty impressed with the city’s cathedral! Towering at over 500ft, La Sagrada Familia’ is well worth a visit! You’ll be amazed at the sheer size of it, never mind the detail etched into the building. Yet, when you go to take a photo the scaffolding allows seems to get in on the act.
I wouldn’t recommend waiting until it’s finished to get a great shot – it’s taken 100 years to build and isn’t likely to be complete in the next few. So here is a tip to get round this scaffolding or any other distraction you might find when taking a photo of a landmark or person – get rid of it before you press the shutter.
There are a couple of ways to do this:
1) Move around until the distraction is out of the frame
2) Hide the distraction by placing your subject in front of it
3) Zoom in so you are getting as much of the subject and as little of the distraction as possible
4) Crop the image (using Picaso/mobile app/printing company)
5) Focus on one part of the subject – whilst you’re leaving parts out (including the distraction) you make the viewer use their imagination to complete the image – this can have a stronger impact.
This collage shows how to remove distractions, whether it’s scaffolding, a shack, or wire fence.
Photo Tip 3
Emphasis it!
There is a simple way to really emphasis the elements of the photo you’re trying to capture – fill the frame with it! I took this photo a couple of weeks ago on Portstewart Strand (a favourite spot of mine!) during a thunderstorm. The sky was dark, the rumbles of thunder could be heard in the distance and the beach-goers were packing up! I wanted to capture the sheer size and presence of the dark sky. By filling ¾ of the frame with the sky really helps emphasise this. You can ever go 7/8 of the frame but for this photo I wanted to get the beach and flag in to add a bit of foreground interest! This tip works well for photographing landscapes under gray skies. However, this time it’s ¾ landscape and as little gray sky as possible!
Photo Tip 4
Creating depth in your landscape photos
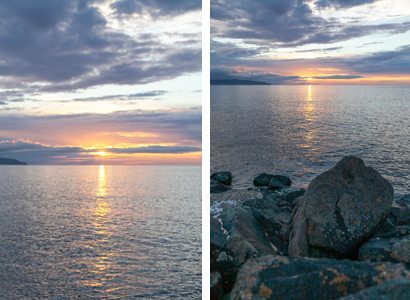
Landscapes can make for powerful scenes, yet when we photograph them they often don’t have that same impact. They can look flat, not conveying the sense of depth that we perceive when we see the scene in reality. One tip to fix this is to ensure you have a fore, middle and background in the photo – this will add depth to your scene photo of the sun going down over the North Coast has a middle & background. But when you add a foreground to the scene it adds depth to the image, making it more dynamic and less flat.
Foreground: rocks
Middleground: ocean
Background: sun & sky
You’ll be surprised at the difference it can make! Good luck
Photo Tip 5
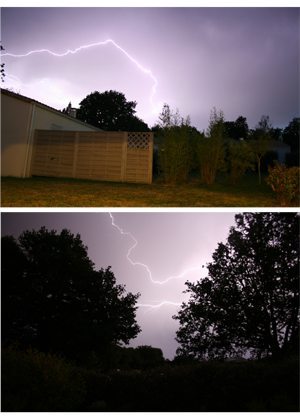
In keeping with the weather theme, this weeks tip is on photographing ‘lightning’. You need to be patience, and have a little bit of luck on your side to capture one of nature’s greatest shows but it can be well worth it!
First off, switch your flash off and find somewhere steady to rest your camera. Next, start shooting! It’s going to be very hit and miss (hence the bit of luck needed) but chances are if you shoot constantly, you are likely to catch the lighting in one of your shots –the rest you can delete. If you have a camera that allows you to set the shutter speed, try 15-30 secs, or longer (if at night time).And remember to add a point of interest into the photo – anything to give the photo that bit of dimension. Here are a couple of photos I took in France during a lighting storm – I deleted the other 20 shots that had no lighting bolt!
p.s. I’m assuming you’re all sensible enough to be careful during lighting – try and find a sheltered spot for you and the camera – you’ll be both more protected
Photo Tip 6
Photographing in the sun
Believe it or not the sun can be a photographers worst nightmare for portraits – it can give harsh light, and lots of uneven shadows. So with the sun hanging around Northern Ireland for at least the next few days here is a great tip for taking nice portrait photos when the sun is blazing in the sky. Rather than place the sun in front of your subject (basically using the sun to light their face) place the sun behind your subject. You will get a more natural look from your subject as they won’t be squinting. And a more flattering photo as the light is a lot softer on their face.
Hollie, my little assistant, shows you the difference. With the sun in front of Hollie, her face is half light by harsh light, with the other half in shadow. She’s also squinting. But with the sun behind Hollie, her face is more evenly lit, and there is a nice glow around her head, and she is not squinting – a more natural look!
An even better tip is find a spot in the shade
Photo Tip 7
Try making your photo more powerful!
A great way to emphasise the main subject in your photo (in this case the sunset) is by using lines to lead the viewer’s eye through the frame. It can often create a powerful image. Lines are everywhere in the landscape – walls, paths, rivers & coastlines are some examples. Give it a go!
Photo Tip 8
Get out of Automatic
Someone once said to me ‘Owning a SLR camera and shooting in ‘Auto’ mode is like driving a Porsche in 1st gear’. If you shoot ‘Auto’ let’s get you out of 1st gear – try ‘P’ mode on your dial – it’s semi-automatic which gives you a bit more control (shutter speed etc) but can still make the decisions if you want it to! And the flash won’t pop up – unless you make it!
Photo Tip 9
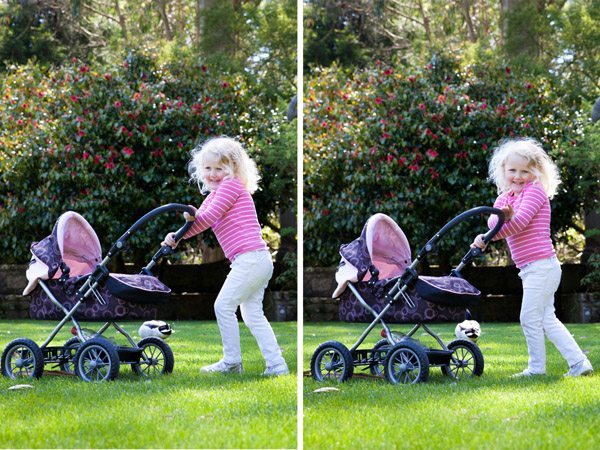
Shoot & delete
I‘ve learnt if you wait for the perfect shot, you’re likely to either not get it or miss it. Take advantage of the freedom digital photography gives & take multiple shots of the same picture – you’ll dramatically increase you’re chances of getting the ‘perfect shot’. And if you don’t, then simply delete them!
Here are 2 photos of Hollie taken within a second of each other – I deleted the 1st, kept the 2nd!
Photo Tip 10
Anticipate the shot
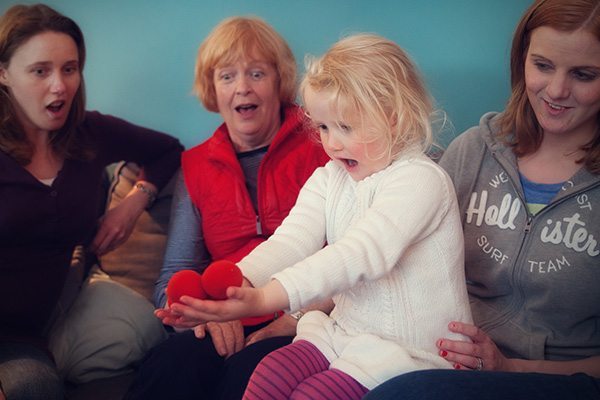
Have you ever heard yourself say ‘That would have made a nice photo’ or ‘I should’ve had the camera out’. Or you get your camera out and then say ‘Do that again’ but it just doesn’t look the same. So often we miss capturing real laughter, celebration or surprise and it’s very difficult to re-create. Try anticipating the shot before it happens.
This is Hollie being amazed by Uncle Lewis’ Magic Ball trick
Photo Tip 11
Be Creative
If 10 people were asked to photograph ‘Capitol Hill’ building in Washington DC, it’s likely 9 would come back with the 1st image. There’s absolutely nothing wrong with it, but it will be the same as everyone else’s. Why not try to be creative and find a your own take on the building.
Photo Tip 12
Panning
Trying to photograph moving subjects can be tricky, especially if you want to capture the motion in the picture yet keep the subject sharp. Try not to just point & shoot. Try panning (moving) your camera in time with the subject. If possible focus on the subject, then follow them whilst keeping them in the same place in your frame, and then fire. It can take a bit of practice, but the results are well worth it.
Hopefully you’ve found these photography tips useful. If you want to understand how I come to ‘see’ certain shots and set the camera up for them pop over to the ‘Inside The Mind of a Photographer’ blog.

